Tuesday, 25 June 2024

Looking back

Over the weekend I opened Blogger for the first time in absolutely ages. Sitting at the top of my drafts was the start of a post I had planned to publish at the beginning of 2020...


Looking back now, it seems so appropriate that before I had any idea of what was to come,  I had chosen the word 'Challenge' for 2020. 

I'm sure like me, many of you found 2020 challenging; but the crazy, mixed up, and sometimes scary world events of the year were definitely not what I had in mind at the time at the time of starting that post!


Way back at the beginning of 2020 (it seems like forever ago now doesn't it?) I was looking at the word completely differently. 

When writing that post I had committed to a 100-day stitching challenge and had just started a year-long stitchalong. I had also just discovered and decided to participate in a 52-week sewing challenge. I really wanted to challenge myself and push my crafting boundaries.

So what happened with my challenges? Well...

I did actually do quite a bit. I didn't meet all of my challenges, but with everything going on in the world (and in my own home - it was a challenging year here as much as in the wider world, though for different reasons) I'm going to call it a success. We got through it and we survived!


Bringing this thing back!

It's been a while, and I probably could, or should, have just let this little blog make a slow quiet disappearance but instead, I'm bringing it back!

I've got a new project and I need somewhere to track my progress and store my notes and pics, so here it is :)

Watch this space for more info and updates on my latest crazy little project.

Friday, 10 August 2018

Cosplay Sewing 2018 - Lily Hoshina

My monster is planning to attend a con at the end of September and she has decided to cosplay Lily Hoshina from "B: The Beginning" for the event.

I've never seen the series and know nothing about it so she sent me some pics of the character so I can help her put together the costume.


I'm so pleased that the character and costume she's chosen appears be relatively simple to recreate - no elaborate foam crafting or makeup skills required.

She's on a pretty tight budget to put this costume together so a real leather jacket is out of the question but I think I've found a pattern for a reasonable facsimile of the jacket (with a few minor modifications).

The pattern I've settled on is  Jacket Pattern 4305 by Lekala sewing patterns.


I think with the addition of patch pockets on the bust it should work for the cosplay.

Now to tackle the actual making of what is possibly the most complex garment construction project I've ever taken on. 

This one definitely warrants making a trial version before cutting into the more expensive pleather (or whatever I end up finding/buying for the real version) so I'm off to the fabric store.

I'll keep you updated on how this one comes together. Keep your fingers crossed for me.

K


Tuesday, 31 July 2018

One-off custom quilt

One of the things I really enjoy about working with fabric is the ability to make gifts that are really personalised to the recipients.

My significant other (SO) is a keen online gamer and through that has made friends the world over. When he said a few months ago that he would like to send an Aussie care package to a couple of his gaming friends in the US and asked if I could do something special and unique in fabric as an extra item to include in the package I jumped at the chance.

I know that my SO was initially thinking that I might do something with an applique design using the recipients' gaming logo, and in all honesty it probably would have been a quicker project had I done so, but applique really isn't my thing. I almost certainly could have done the design component for what would have been a multi-piece applique, but I'm just not confident with the actual sewing part  - I can never seem to get the finish of an applique project just right no matter how hard I try. So for this project I just knew I had to do a paper-pieced design.

I'm not sure that my SO had a proper understanding of what I do as far as quilt design and construction before now so it was really nice to have him involved in the design process, seeing it come together and being so supportive and helpful as I worked on this one.

In the end the finished project turned out a bit bigger than either of us had initially thought at 30-inches square for the paper pieced logo panel plus a bit extra added all around, but I think it turned out to be a good size for either a lap quilt or a wall hanging (rod pocket added to back so it can be hung easily) and I'm really happy with the overall look of the finished piece. It's not identical to their logo, but I think its pretty close.


Paper-pieced quilted wall hanging/lap quilt
One-off custom pattern designed by me based on the Liberate Gaming logo 

I hope the recipients enjoy the Aussie package, including the quilt. I'm pretty sure the Tim Tams will be a hit and the Vegemite is sure to be an interesting experience!
Tim Tam assortmentVegemite on toast
(image source: https://en.wikipedia.org/wiki/Vegemite)


Sunday, 29 July 2018

Dry season project dilemas


The season referred to as winter doesn't really happen here in the tropics; instead we have a dry season when the humidity drops significantly and the daily temperatures hover in the 18-31 Celsius range. It really is a beautiful time of year, and the sunsets are spectacular!

The cooler, dry weather means that it's much more bearable to work on projects that end up in your lap or draped across your body while you work - large quilts, knitting, crochet etc.

This dry season my go-to project has been a large crochet blanket. I'm working on the "As-We-Go" Stripey Blanket by Hannah Owens (Pattern on Ravelry).

As usual I haven't made things easy for myself. The pattern was originally designed as a throw blanket, but I decided to go all out and make it a full queen/king size blanket. I'm at the point now where I'm wondering whether that was such a good idea or not.

I love the colours I've chosen, and I love the pattern, but it's sort of busy looking and I'm actually beginning to think that an entire bedspread in this stripey pattern is just going to be too much.


So now I need to decide... do I continue with repeats of the pattern for the whole length of the blanket? or do I alternate with multiple rows of a single colour? and then if I do that, which colour? and which stitch pattern? Do I just have the stripey pattern for the top and bottom of the blanket with solid colour in between? or have 3 or more of the stripey panels?

Too many decisions.. Help! I need outside opinions in this one before the whole thing ends up as a never ending WiP.


Goblin King: Labyrinth Quilt and Stitch Along - Finished Quilt tops

I was just updating my WiPs page, and going through old posts, and I realised I never posted the images of both of the completed Labyrinth quilt tops after the quiltalong event.

I did post pics of the Black and Grey version...

Goblin King: Labyrinth Quilt and stitch along - Completed quilt top
Embroidery on white panels

But I didn't post pics of the version I was doing with the orchid / purple panels... so here it is

Goblin King: Labyrinth Quilt and Stitch Along - Completed quilt top
Isn't it amazing how much of a difference fabric choice makes with the look of the finished product?


Wednesday, 10 January 2018

Crochet Creations


Needing a portable project to keep myself busy while a passenger on our recent cross country road trip I took the time to acquire a new skill - Crochet!

I had planned to get some work done on a couple of cross stitch and embroidery projects while on the road, but just before we left I made an impulse purchase of some cheap ugly yarn and a set of crochet hooks. I also downloaded a free 'learn to crochet' e-book. It was probably a good idea in the end - it didn't take long to work out that moving car, bumpy roads and sharp needles are not a good combination.

My first crochet creation was the most hideous, mismatched pair of finger-less gloves ever. I almost frogged them but the monster adored them and wore them almost non-stop while we were in cooler climates. I'm really glad that first lot of yarn was cheap acrylic because the gloves needed washing several times after getting covered in dog slobber and hair, mud and grass. The acrylic held up well to to all of that.

My first crochet attempt. Finger-less gloves.

Feeling reasonably confident and inspired by my semi-success with the gloves, I made sure to pick up some slightly nicer (but still reasonably cheap) yarn during one of our stops and started work on a beanie for myself.

The beanie wasn't finished until several days after our visit to the snow, but I got it finished, and it turned out awesome!  It's basic but it's squishy and soft and warm; everything a beanie should be.

Car-selfie taken only seconds after I wove in the last tail of my second ever crocheted item.
Sadly it's too hot to wear my beanie here at home in the tropics so it will probably not be seen again until our next adventure to the cooler southern climates, but I did it... I learned a new skill and made something for me, that turned out better than expected.

Since we've returned home  I've turned my hook to some other bits and pieces including some Christmas decorations and a sampler afghan trying out a few new stitches. So now I have a a couple more works in progress and a whole heap of crochet creations on my to-do list.... crocheted clothes, slippers, hats, more blankets.... the list goes on.  But that's OK. It's another portable craft that I can switch to when I feel like I want to change things up or need a break from other things.

They do say that variety is the spice of life, and as far as my crafty stuff goes my life is feeling pretty flavourful right now :)

Until next time

K


Saturday, 6 January 2018

Let's do it again... #PODQAL2018

Did you see the Harry Potter themed bookcase quilt I made and gifted recently? My post about it is here

There was a lot of work (and love) went into making that quilt, and as I was making it I felt sure that it was the only one that I would ever do. 

But I should know by now that you never say never... because I'm about to do it again!

The quilt is the Harry Potter Bookcase quilt (AKA The Project of Doom or PoD). Patterns are free and available over at my favourite fandom/quilting site fandominstitches.com. There is also a very active and welcoming facebook group. 

We're running a quilt along over in the facebook group from today right through to the end of August and I'd love for you to join in with us. 

You don't need to have any experience paper piecing, and your quilt doesn't need to be the monster size that my first one was. We're taking a choose your own adventure approach - you decide how big you want your quilt to be, how much time you have each week, what you want to include etc and there will be lots of encouragement and advice available in the group.

So head on over and join the facebook group to join in the fun (make sure you answer the question on joining, and have a read of the group rules)

https://www.facebook.com/groups/projectofdoom/


Look forward to seeing you there.


K

Thursday, 14 December 2017

Project of Doom - Block details

I'm on a roll! 2 posts in one day.... image spam coming up...


As promised in my earlier post, here are each of the blocks in my Project of Doom / Harry Potter Boockcase quilt top.


The Un-bloggable Quilt - Finished gifted and now bloggable

You may have noticed me referring a couple of times to a quilt that I've been working on but not blogging about (the un-bloggable quilt). Well its finally finished and its been gifted so I can post about it now. Yay! I've been itching to share this one with you.

The quilt is the "Project of Doom" (PoD) Harry Potter bookcase quilt from Fandom in Stitches and it's taken me 18 months on and off to get this king-sized quilt pieced, quilted and finished.

So without further ado.. here it is...


Finished quilt front
Finished quilt back
I can't thank Jennifer Ofenstein and the FiS community enough for the patterns, inspiration, ideas and support as I went through the process of making this quilt. It took forever, but I'm thrilled with how it turned out.

More details on the individual blocks and the quilting process in coming posts.

Until next time

K

Sunday, 3 September 2017

Trying something new (to me)

It was months and months ago that I acquired a super cheap, second-hand Janome overlocker.

After the overlocker came into my possession it spent a few weeks in the trunk of my car, and then several months languishing in a box while I focused on a few quilting project deadlines. Finally those quilting projects are done so I've been able to put the sewing machine away and pull out the overlocker for a bit of a play.

She's a really old Janome MyLock 234D and on top of my months of neglect, it looks as though its been a very long time since she's been used.

I spent a few hours today cleaning her up, oiling her and then more than an hour working out how on earth I was supposed to thread her (and lots of fiddling with a super long needle threader). After all that it was a major fingers crossed moment hoping that she would actually work.

And guess what? She chugged along almost perfectly the very first time!

All threaded and ready to go

She even stitches!
After a stitching a few scraps and adjusting the tension I was good to go...Except for one thing...

Wednesday, 19 July 2017

Two steps forward... One step back...

Do you ever feel like you're going so slow or having so many setbacks on something you're almost going backwards? Well that's how I've been feeling the past few weeks.

I have a deadline of early next week to finish one of my largest un-bloggable (for now) quilts, and that's pretty much all I've been working on for the last month so apologies for the absence. While I am not able to write much about the actual project (yet), I can use this post to vent some of my frustrations!

Sunday, 25 June 2017

Speedy Stitching


Sometimes you need to change things up a bit. I was like that the other night.

I've been in a quilt finishing frenzy recently - frantically trying to get a couple of quilts finished in time for the local show in a month - it felt like I was getting nowhere fast and I sort of lost my mojo.

A quick sew was in order and this little earbud pouch from Dog Under my Desk was just the thing.

Earbud Pouch - front
(from pattern and tutorial at Dog Under my Desk)

The great fabric the monster picked for the reverse of the earbud pouch

The monster chose the fabrics from my scrap stash, I just happened to have the perfect zip colour in my box of assorted randomness, and it came together in about half an hour.

This is a great, easy and super quick sew. I can see this little project becoming a regular in my repertoire of go-to last minute gifts.

Now back to quilting.

Until next time.

K

Sunday, 18 June 2017

I made a thing! Sewing machine extension table

I've reached the stage now with a couple of my WIPs that I will soon be doing a LOT of quilting (as opposed to just piecing quilt tops).

Each and every time I've done a quilt on the Brother in the past I've cursed that I don't have an extension table to make the quilting process a bit easier. I've had a look online and at my local stores and haven't been able to find anything that comes in at under $100. With cash a little tight at the moment, and WIPs needing finishing I decided to put on my big girl DIY pants and make something myself.

So off the the local hardware store I went (twice actually!). I came home with:

  • 600 x 900mm MDF customwood
  • plastic cabinet legs
  • 3mm plastic tubing
  • Glue

A bit of measuring, cutting and gluing later and I'm done! A benchtop extension table custom made for my sewing machine (and larger than any of the commercial ones I've looked at).


Sometimes I need a little reminder that sewing and crafting tools are not the only tools in existence and this project was just the thing. All up it came in at about $35 of materials and completed in just a few hours - win!

Now lets see if it holds up to the volume of quilting I'll be doing over the next month or so.

Until next time.

K

Saturday, 17 June 2017

Extras - Goblin King: Labyrinth Quilt and Stitch Along

Originally intended to be part of the design invitational, this pattern didn't quite get finished in time. But its done now and published on fandominstitches.com so I can share it with you all. Yay!

A huge thank you to the wonderful Jo Minvielle who tested this pattern for me in record time.

Paper pieced Labyrinth Title - Designed by me, tested by Jo Minvielle.


I designed this paper-pieced pattern to complement the quilt layout presented in the Fandom in Stitches Goblin King, a Labyrinth-themed Quilt & Stitch along.

It is an absolute monster of a block, finishing at 60 inches long by almost 15 inches tall. The intention was to create a title block that you could put inside the outer border of the quilt, at either the top of the bottom of the original layout.

If you are planning on using this block in conjunction with the QAL layout, you might want to add extra sashing around it so the spacing between this block and the character blocks doesn't look too uneven. You will also need to adjust (increase) the length of the outer border strips for the finished quilt.

Download the pattern here if you want to give this pattern a go, and don't forget to share pics of your finished work. I love seeing how others interpret my designs - no two ever end up the same.

Don't forget also, that all the patterns from Goblin King: Labyrinth Quilt and Stitch Along are available over at fandominstitches.com.

Until next time.

K

Wednesday, 24 May 2017

Week 21 - Goblin King: Labyrinth Quilt and Stitch Along

We're finally here! We've made it to the very centre of the Labyrinth and final week of official event patterns.


Of course the only way to finish off a 'Goblin King' event is to feature the Goblin King himself, Jareth, played in the movie by the late, great, David Bowie.

Friday, 19 May 2017

Week 20.3 - Goblin King: Labyrinth Quilt and Stitch Along

Week 20 saw the release of my Humongous embroidery pattern as well as the assembly instructions for the left and right sections of the #LabyrinthQuilt on fandominstitches.com

Again the assembly instructions require adding sashing to each embroidered block before joining the sections together.

This week we work with Sir Didymus and Ambrosius, the Firey and the Four Guards.

I forgot to take pics of the individually sashed blocks, but the joined sections can be seen below.

Week 20.2 - Goblin King: Labyrinth Quilt and Stitch Along

Continuing the assembly series - this is the second of 3 catch up posts.

Top and Bottom Section Assembly (from Week 19)


Week 19 was the start of actual sewing to put the quilt together.

A silly mistake

I was so excited to get to this part and get sewing, but when I pulled out all my completed blocks, I found several of them to be looking a little dingy. Sweaty hands + white fabric + embroidery hoop = not quite white fabric. It was irritating me. It was then that I made made a decision that I'm now seriously regretting...   I tried hand washing the unfinished blocks and of course some of the colours ran!
Wiseman's bird with reddish halo from the thread colours that have run.

Toby with some extra "shading and shadows" thanks to colour runs.
I've learnt my lesson. I'll use exclusively DMC embroidery thread from now on (only the non-DMC ones ran) and don't wash without colour catcher sheets in there (even hand washing).

Frustrated but still keen to move on to assembly I've left them as-is for now and pressed on. Hopefully a good wash once the quilt is finished and bound, with several colour catcher sheets in with it, will sort it out. It will be fabulous if that does work but as this is neither a gift or a show quilt I'll still enjoy the end product even if it doesn't.

So anyway... moving on...

Week 20.1 - Goblin King: Labyrinth Quilt and Stitch Along

The posts on fandominstitches.com over the past three weeks for the #labyrinthquilt have included not just the character of the week, but also parts of the assembly instructions for the quilt.

As you know I'm doing 2x embroidered versions of the quilt. I am determined to have one of those finished with the quilt and stitch along; the other may need to wait a bit to be finished as I have a few other projects and deadlines coming up.

I've been a bit slack in posting my pics, so I'm about to make up for that with a series of 3 posts at once and lots of pics to catch up.

Wednesday, 17 May 2017

Week 20 - Goblin King: Labyrinth Quilt and Stitch Along


This week I'm pleased to be able to present another of my own embroidery designs for the Goblin King: Labyrinth Quilt and Stitch Along - Humongous!

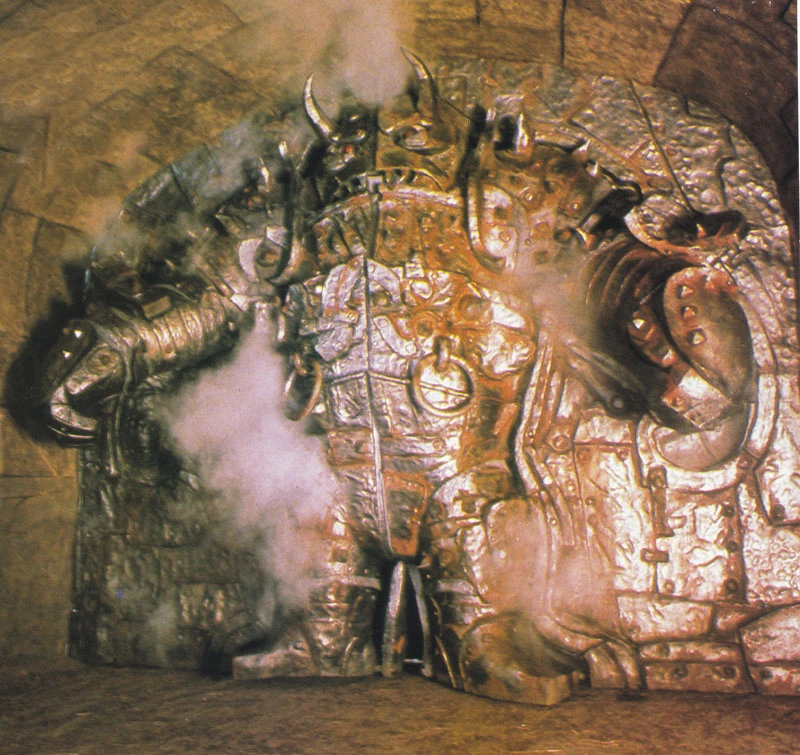
I'm not sure whether he actually qualifies as a character in his own right, being essentially a metallic shell controlled like a giant puppet by a couple of goblins, but here he is.

In addition to my embroidery design, Angela Gross has also designed a fabulous paper-pieced version of Humongous.

Both patterns are available to download now from fandominstitches.com

Here are my two stitched versions of Humongous - he's designed to fit a 6 inch finished square and I've put quite a bit of detail in there so he's possibly just a little more intricate and time consuming to stitch up than some of the patterns in recent weeks.


If you're going to give my Humongous embroidery a go I suggest that you start with a larger piece of background fabric to allow for ease of hooping and trim it down to 6.5 inches when you're ready to assemble your quilt. I also strongly suggest not using more than about 2 strands of embroidery thread or the detail of the suit will be difficult to achieve.

That's it from me this week. I really should post about the assembly so far, but that will have to wait until next time.

K